
Haohan Zhao
Tuesday, December 17, 2024 | 2 minutes
Vscode remote ssh
0.1 Install plugin
Search for Remote-SSH in the plugins store, and install it.
0.2 Edit .config
Open the .config file.
In Windows, the path of this file maybe: C:\user\username\.ssh\.config.
In Ubuntu, the path of this file maybe: /home/username/.ssh/.config.
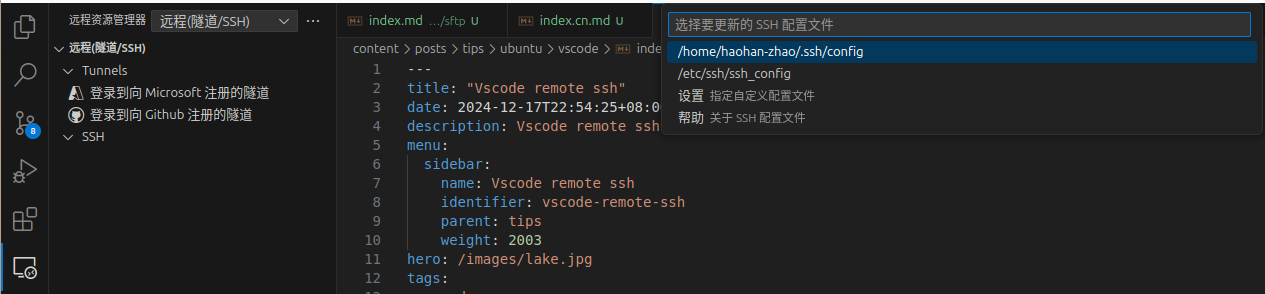
You can also find the file via Remote-SSH plugin in vscode, as the picture below:
Edit it in vscode:
Host alias # customize the name of your remote server
    HostName hostname # server ip
    User user # username
    IdentityFile ~/.ssh/id_rsa# the rsa secrete key if you want to log in the server without password, see section 0.3
Then you can see the remote server under SSH of picture 1, click it and connect to your server.
0.3 Connect without password
If you didn’t sepcify the IdentityFile in .config, you need to input your password everytime you log in the server.
We can use secrete key and public key to connect it directly.
0.3.1 Generate rsa key
First, open the terminal (linux) or cmd (windows), and input ssh-keygen -t rsa.
-t rsaspecifies the type of secrete key.- Repeat
Enteruntil the end.
This operation will generate two files in the .ssh directory (the same as you .config).
id_rsa: secrete keyid_rsa.pub: public key
Open the id_rsa.pub and copy its content.
0.3.2 Add to your remote server
Open your remote server’s terminal and cd to ~/.ssh.
Open a new file authorized_keys via vim authorized_keys, and paste the content of id_rsa.pub into it.
Finally, change the permissions of .ssh:
chmod 700 ~/.ssh
chmod 600 ~/.ssh/authorized_keys